Just Another Mom HQ

Just another Mom's guide to a healthy lifestyle

  • Home
  • Recipes
  • Essential Oils
    • Visit My Oils Page
  • All Natural Products
  • Sydi’s Blog

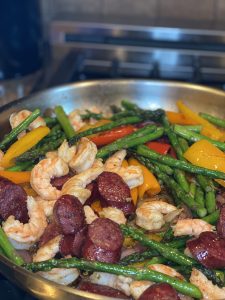
Fresh Spring Shrimp and Sausage Fajitas with Asparagus

Looking for a delicious, healthy and fast dinner?  With social distancing and a stay at home order in effect I have been giving myself time to slow down and actually cook instead of tossing everything together fast and not enjoying the process.  For me cooking is a stress reliever so after helping my kids with their schooling it is a welcome task.

I understand you may have to plan ahead for this meal as not everyone keeps shrimp in their freezer for quick meals like I do, but trust me it is worth it!


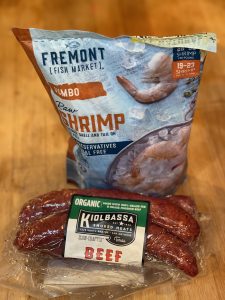
The sausage I prefer is the grassfed beef Kiolbasa, they have it at Costco.  (I think Kiolbasa is the name of the company).  It has a really nice snap to the casing and is rather garlicky, in the good way.

The shrimp is 16-20 count, Jumbo Shrimp that has been deveined but not peeled.  I prefer the frozen shrimp they sell at Aldi, Fremont Fish Market.  They are wild caught and are not pumped with anything so they have a great texture and the price is pretty awesome too!  Currently the jumbo shrimp is $6.49 for a 12oz package which is a super sweet deal!

I use avocado oil in my higher heat cooking as it has a high smoke point while also being super healthy for you.  Virgin coconut oil would be great too, but you will notice a hint of coconut flavor…hey this may not be a bad thing…

I only had mini sweet peppers on hand so I just cut the top off to remove the stem and seeds then sliced them in half.  Alternately a yellow and a red bell pepper seeded, stemmed and sliced would be perfect.

So on to the process…as I mentioned I didn’t have to devein my shrimp (remove the vein that runs down the back) as they came that way.  I cook them with the shell on as it lends a lot of flavor, but if you prefer peeled or that’s what you have on hand, no worries!

Asparagus is in season right now, and it’s super easy to work with.  Just be sure to cut the tough ends off as they are impossible to chew.

Preparing everything is super fast as all that’s left is slicing a red onion, slicing the sausage into 1/2″ rounds, crushing about 5 garlic cloves, cutting the asparagus in half and slicing a red and a yellow bell pepper.  I keep a jar of the spice blend already mixed up in my cupboard for everyday use, please see recipe for that below.

Heat a large sauté pan (11″ minimum) over medium high heat.  When your pan is hot drizzle in about 2 tablespoons avocado oil.  Swirl to coat the bottom of your pan.  Brown the sausage slices along with the peppers and onions in the pan for about 5 minutes then add the garlic.  The sausage are fully cooked so you just want to add a bit more flavor by adding a little caramelization (not sure if that’s a word…).  Be sure to stir everything up to keep the garlic from burning, and cook for about 2 minutes.

Now add the shrimp and asparagus along with a tablespoon of fajita seasoning, continuing to sauté for about a minute being sure to coat everything in the deliciousness that is in the pan.  Grab a pan lid and a couple tablespoons of water.  Add the water to the pan, cover and let the shrimp and asparagus steam for about 5 minutes, until the shrimp are pink.

Serve on tortillas or coconut wraps (paleo/keto option) along with some fresh sliced jalapeños and fresh cilantro (optional)  Enjoy!!

Fajita seasoning recipe:

  • 1 Tablespoon Cumin
  • 1 Tablespoon Onion powder
  • 1 Tablespoon Granulated Garlic
  • 1 Tablespoon Smoked Paprika
  • 1 Tablespoon Chili Powder
  • 1 Tablespoon Lime Zest
  • 1 teaspoon ancho chili powder (optional, but awesome)
  • 2 teaspoons oregano
  • 2 teaspoons thyme
  • Small pinch of salt
  • 1/2 tsp Pepper (adjust for your tastes)
  • 1 pinch cayenne (optional)

Helpful hints:

If you don’t have a large sauté pan brown the sausage first, remove it, sauté the onions and peppers next adding the garlic and spice blend a minute or so before they are done.  Don’t crowd the pan as you will end up steaming everything instead of cooking it in oil.

If you are interested in a new pan, I love the new NUCU line that is being produced by Vollrath Company.  They are based in Wisconsin.  The stainless pans are beautiful and rival (in my opinion conquer) some of the well known brands out there.  If you live near me, you can buy them at Relish Kitchen Store.
 

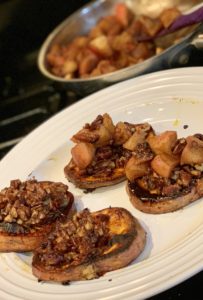
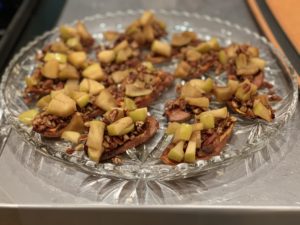
Caramelized Sweet Potato Slices w/cinnamon pecan crumble and warm and spicy chunky apple reduction

Working on Thanksgiving meal plans and need something fun and new?  Maybe you have some guests coming who follow a healthier lifestyle and you are freaking out because your Mom only taught you how to make sweet potatoes with marshmallows on top?  Sorry if you love the marshmallow sweet potato casserole, but I can’t stand it!  Why on earth anyone would ruin a perfectly delicious sweet potato with a crazy amount of sweetener then top it with marshmallows is beyond me.  But hey it’s our differences that make life fun, it wouldn’t be the same if everyone agreed with me!

While I was putting together a menu for a paleo Thanksgiving class, I became super frustrated with the gratin I was trying to make.  So I scrapped it and moved on to this using the exact same ingredients and I am so happy I did!

Don’t let the layering and steps throw you off, this is a super fast dish to make!  While your sweet potatoes roast, the other parts come together and will be ready and waiting.

So let’s get to it shall we?

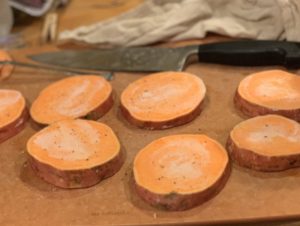
When I made my sweet potato slices the first time I had a nice fat sweet potato so my slices were nice and round.

The second time I used smaller sweet potatoes and just cut them on the bias (diaganolly) to make a plank that was somewhat oval.  Both of them turned out beautifully so work with what you have.  (see topping step, aren’t they pretty)

You will want your slices to be about 1/2” thick so they can hold all the yummy toppings.  It’s now as simple as rubbing them on both sides with melted oil, coconut sugar, salt and pepper.  Place them in a preheated oven and roast for about 20 minutes.  Now if they need more time, carefully flip them over and roast another 5-10 minutes.  When I used my home oven they took close to 30 minutes, but when I used a commercial oven they were perfectly brown and softened in 20.

While the sweet potatoes are getting their caramelization on, prepare you apples by placing all ingredients in small sauté pan.  Bring them to a boil, then turn the heat down and simmer until they are soft and the liquid has reduced to a thick consistency.

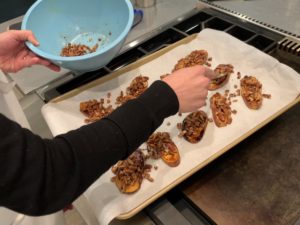
Also while you are waiting for the sweet potatoes to roast and apples to cook, make the cinnamon pecan crumble by tossing the pecans in spices then drizzling with melted oil, tossing to coat.

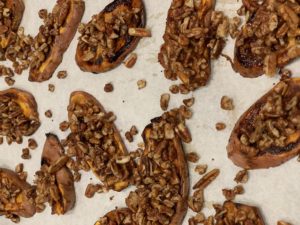
When your sweet potatoes are done, pile the pecans on the sweet potatoes.  Don’t worry if they fall off, you can straighten them up later, or use the ones that fall onto sheet pan as a garnish.  See no worries, this is totally stress free…


Pop the sweet potatoes back into the oven, with the pecan topping and roast for an additional 5-10 minutes or until pecans are golden.  Don’t go too far or they will burn.

Finally top the whole works with apples, and any pecans that may have snuck off the top of the sweet potato slices.  Arrange on a platter for a pretty presentation.  These can be served warm or room temperature.  Feel free to make them ahead and reheat.  Reheating works best if they are not assembled, but they will still be delicious if time only allows you to build them ahead of time.

I recommend these as a side dish or appetizer, but you could absolutely top them with vanilla ice cream or whipped cream and serve as a delicious fun dessert.

However you serve them, enjoy!

Autumn Butternut Squash Crust Quiche with Sausage and Kale


Ahh fall, the crunchy leaves under our feet, the beautiful colors, pumpkin spice…

Sorry to interrupt your daydream but…

I love making quiche as a make ahead meal, it is a great option for a busy night when there is not time to cook.  It’s also a great grab and go breakfast!

For the crust of this quiche I used butternut squash, but you can use any sturdy vegetable.  Think sweet potato, any winter squash, even regular potatoes or beets.

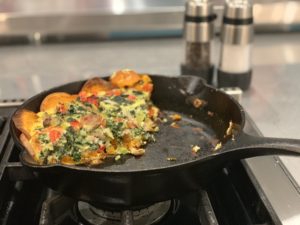
To get started slice the bulb shaped end off butternut squash.  Peel both parts of the squash, and remove seeds.  Slice the long part of the squash into thin rounds, the bottom half into thin slices.  Toss them with salt, pepper and a touch of oil and lay them in the bottom of a pie pan or skillet being sure to overlap them to form the crust.  If there are holes don’t worry, the eggs we add later will help it stay together.

Roast the crust in the oven until squash softens and begins to brown.  Set aside.

For the filling, remove the casings and brown your chicken sausage in a bit of oil.  Alternately you can use cut up breakfast sausage, or fully cooked chicken sausage, just brown it in a pan to get some extra flavor.

While your meat is browning throw in the other vegetables, garlic, thyme, salt and pepper.

Once the sausage is browned and onions, peppers and kale are softened remove from heat and allow to cool slightly.

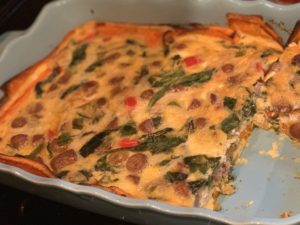
Crack the eggs into a bowl, season with salt and pepper.  Now add the milk and beat the eggs for a minute or so.  Stir in cheese if you are using it (a tablespoon or two of nutritional yeast would be a great sub for the cheese if you can’t have it) then add in the sausage mixture.  Pour the whole works into your squash crust and bake until eggs are set, about 20-25 minutes.

My kids even enjoy these quiche so I usually don’t mess around with a single batch, instead I double the recipe and use a casserole pan.  Just be sure to adjust baking time accordingly (5 minutes more is the most I have added).  Please forgive my pictures it seems my quiche always gets hit before I can snap a proper shot.

You can make this ahead and serve at room temperature, straight out of the oven or refrigerator, or reheated.  It’s a great grab and go breakfast or a nice make ahead dinner.


Enjoy!


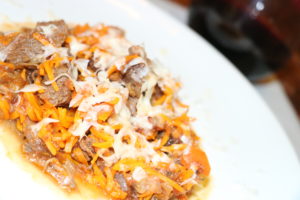
Instapot Italian Beef Ragu with Butternut Squash Noodles (squoodles)

Italian Beef Ragu with Butternut Squash Noodles

Happy New Year!!  I am always sad to take down our Christmas tree and decor.  At the same time I prefer my stand up paddle board to my cross country skis so being one step closer to Spring isn’t so bad either!  This year I am hoping to share more recipes and insight with you, including Instapot recipes!  This recipe can definitely be made stove top as is traditional, in a slow cooker or in your Instapot or other pressure cooker.

Traditionally this delicious slow simmered Ragu would be prepared stove top, simmered over several hours.  For Christmas Day I prepared this recipe with a slight variation stovetop (recipe here) and we enjoyed every delicious bite on some chewy delicious parpadelle pasta.  Yes actual gluten loaded pasta…and it was divine.

[amazon text=Amazon&asin=Today in keeping with my more paleo-ish lifestyle I have prepared it with spiralized Butternut Squash.  The earthy sweetness of the squash paired super well with the deep beefy tomato yummyness.  I also grabbed my Instapot for this one as I was rather short on time and it didn’t disappoint!  I chose to leave out the tomato paste that I had used on Christmas in my more traditionally prepared Ragu as sometimes the tomato paste can burn to the bottom of your Instapot.

For the preparation, turn your Instapot on sauté.  Cut your roast into 4 equal size chunks, season with salt and pepper.  Once your Instapot is hot sear 1 or 2 pieces at a time browning on all sides (2-3 minutes a side).  Then set aside.  Next sauté the “sofrito”, carrot, celery and onion in a bit of olive oil and a pinch of salt and a pinch of black pepper for about 5 minutes to really develop the flavor.  Add garlic, oregano and thyme and continue to sauté for an additional minute or until fragrant.

Deglaze the pan by pouring in 3/4 cup of a good dry red wine, I had a Spanish Tempranillo open so I chose that for my sauce.  Let it simmer for a minute or two or until the liquid reduces just a little.

Pan full of Butternut Squash Noodles

Now add the beef, beef stock, and tomatoes to the veggies and wine. I usually wait until the end to salt as there is salt in the tomatoes and the stock and as it reduces it will concentrate the salt flavor.  Lock cover on Instapot and press manual then adjust to 20 minutes on high pressure.  While your Ragu is cooking grab your spiralized and spiralize your Butternut Squash.  Any pieces that couldn’t be spiralized save for squash fries or squash hash or whatever your desired preparation.  Toss your squash with a tablespoon of olive oil and a touch of salt and pepper and roast in a 400 degree oven for 20 minutes.  You should have plenty of time for this step as it takes a while for your pressure cooker to come to full pressure (up to 15 minutes).

After the 20 minute pressure cook is complete allow to natural release for a minute or so then flip the valve to manual release.  I use my Instapot on my stovetop with a cutting board under it, so I can use my fan to vent steam, etc.  I really don’t want to damage my cupboards while releasing steam or smoke the house up searing meat!  Okay once your steam is all released and you can safely open your pressure cooker turn it off, then back on the sauté high.  Remove meat and shred while the sauce is reduced until it thickens.  Then toss Squash Noodles  (squoodles) into the sauce and let it cook for a minute or two longer.  Season to taste with salt and pepper, pile it on your favorite pasta plate, hit it with a grating of Parmesan or Pecorino and enjoy.

Cheers!

Italian Beef Ragu with Butternut Squash Noodles

PS:  Don’t let the wine you opened go to waste.  If you don’t enjoy drinking it be sure to freeze it in ice cube trays for future recipes.

PPS:  There was an error in the original recipe, I have since reduced the beef broth on the recipe from two cups to one.  Sorry for any inconvenience this caused!

Meet the Author

MaryJo is a busy mom with 3 beautiful children. She enjoys paddle boarding, kayaking. and cross country skiing. She loves food...cooking it, eating it and especially sharing it with everyone.

Connect With Me

  • Facebook

Copyright © 2025 · Foodie Pro Theme by Shay Bocks · Built on the Genesis Framework · Powered by WordPress