Just Another Mom HQ

Just another Mom's guide to a healthy lifestyle

  • Home
  • Recipes
  • Essential Oils
    • Visit My Oils Page
  • All Natural Products
  • Sydi’s Blog

Taco seasoning

 No need to open a packet of taco seasoning from the store laced with msg and other questionable ingredients!  Mix this up and even double or triple and store in an airtight container infinitely.


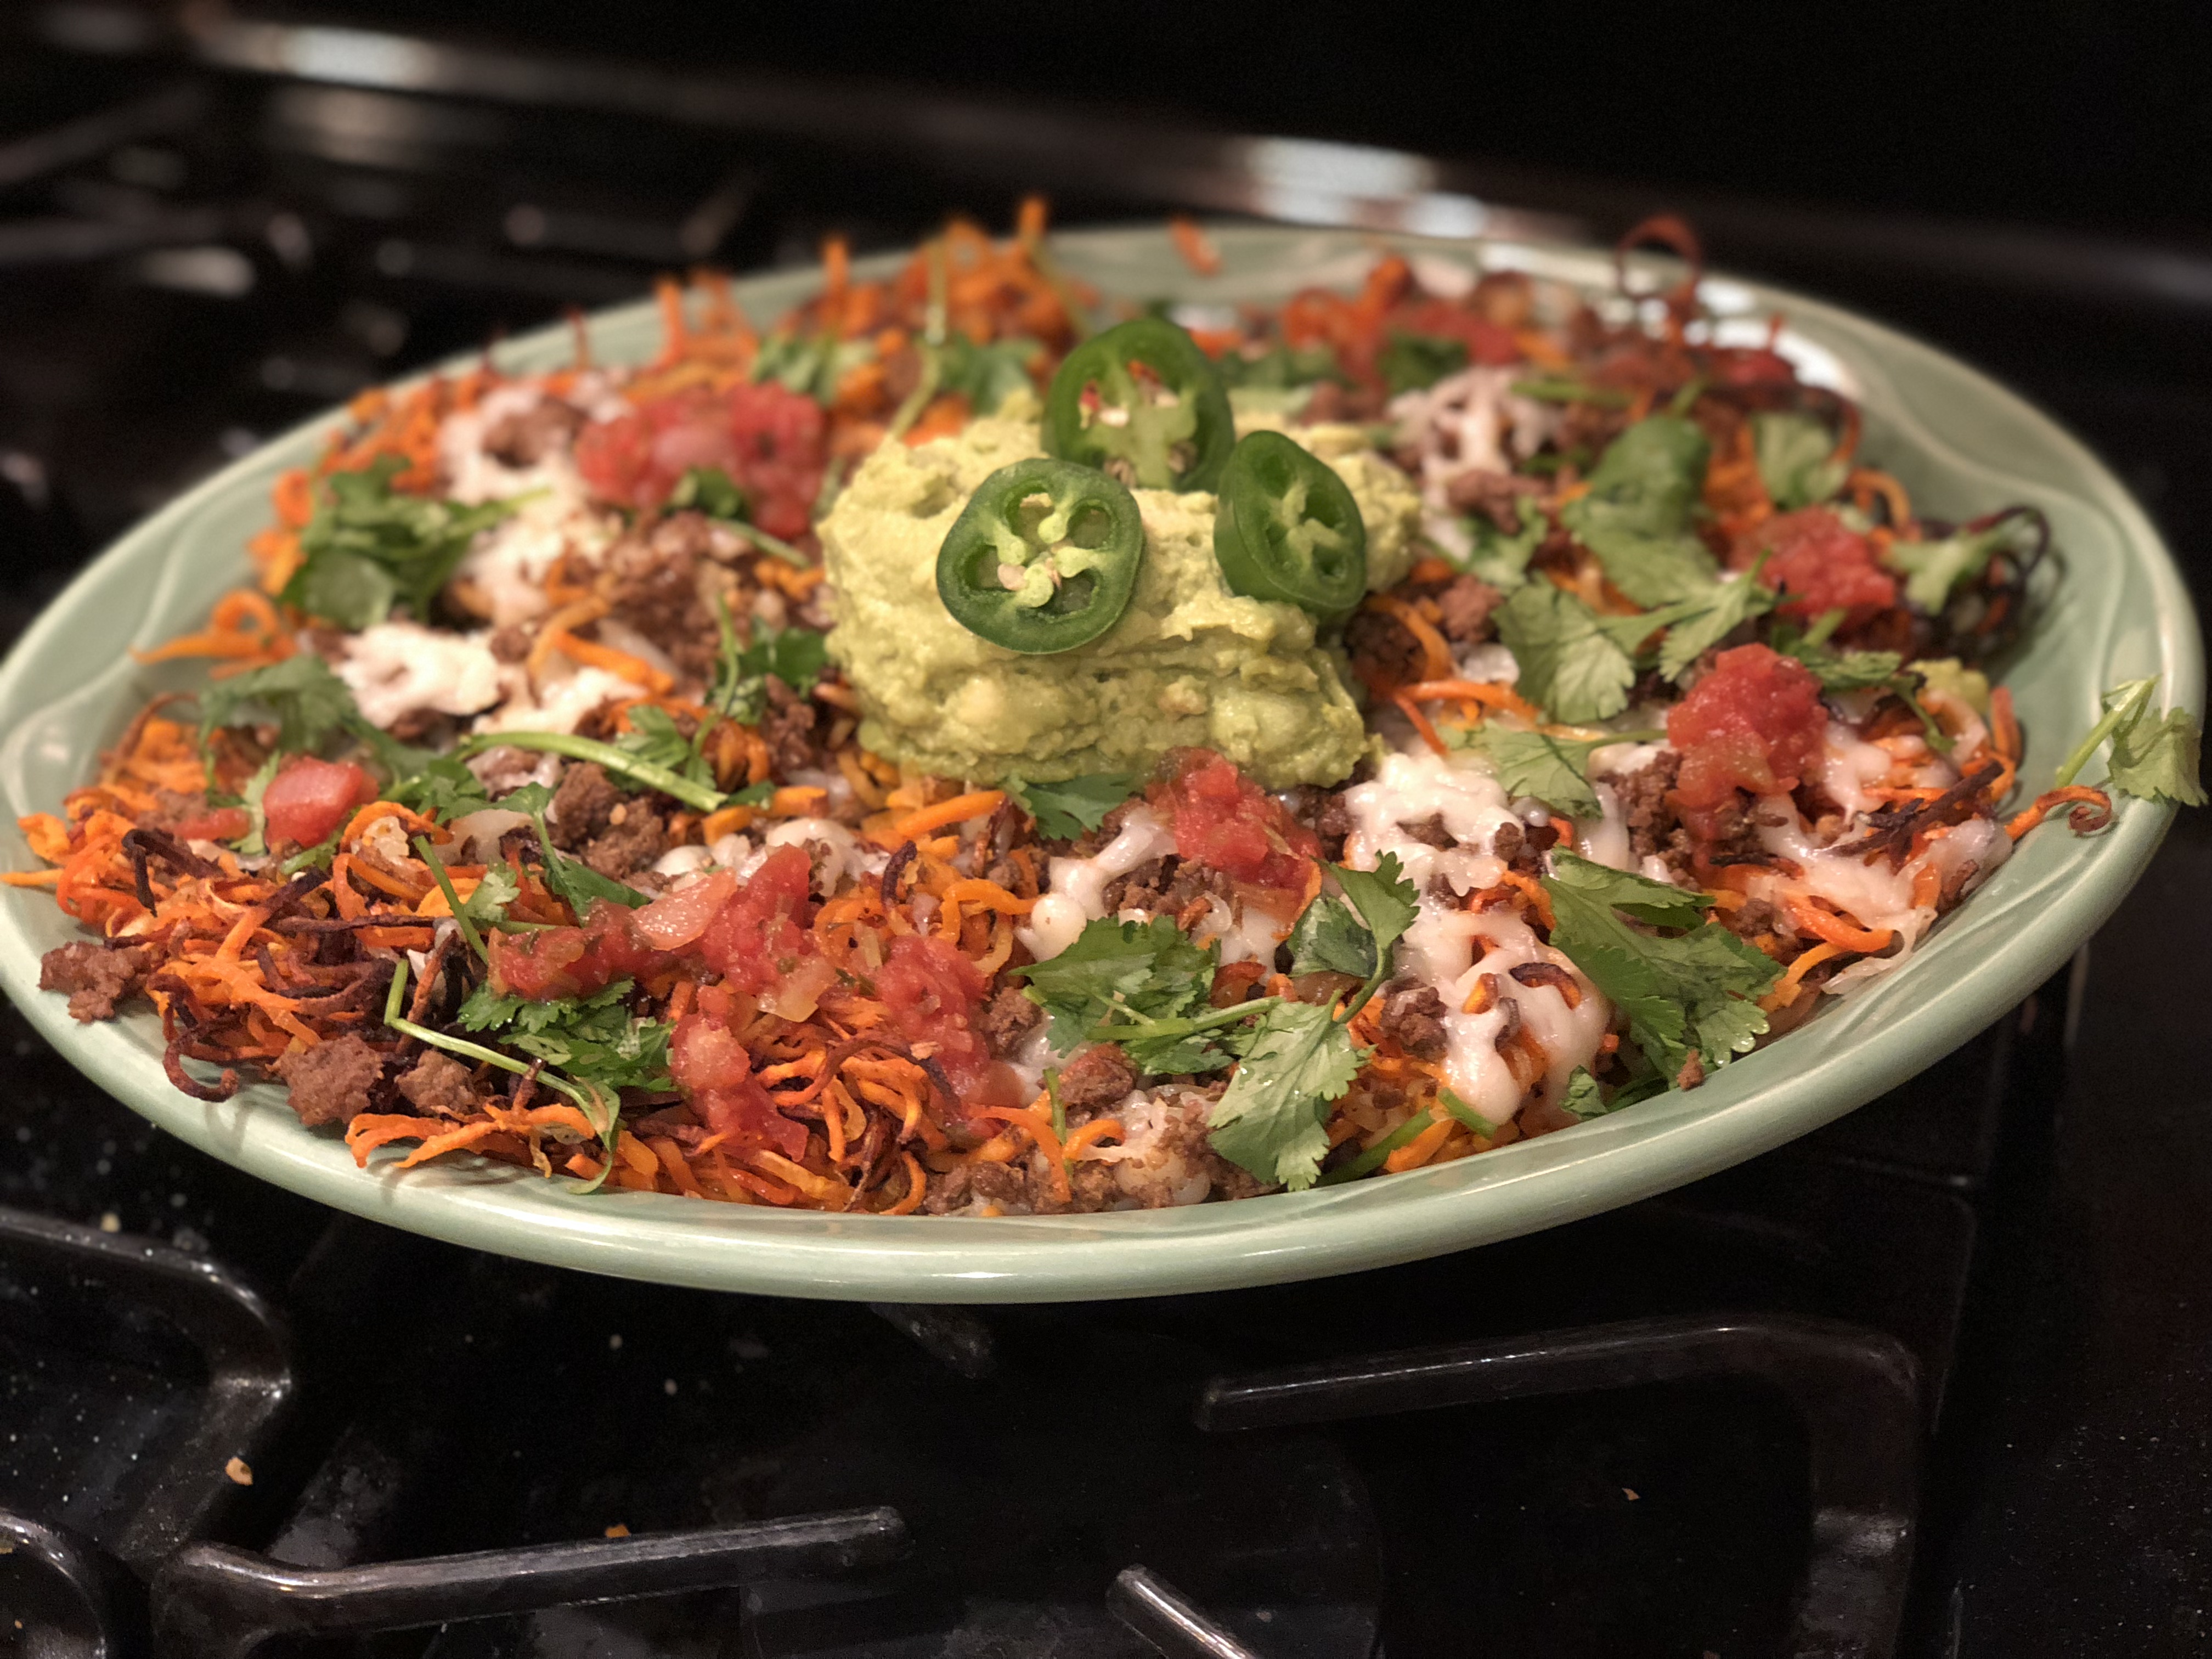
When you prepare your taco meat, sauté with an onion or crushed garlic if desired.   Add seasoning once you drain your meat, just before it is finished browning. (side note I use grassfed beef so there is no need for me to drain the fat/water from the pan, so I add my seasoning midway through browning to really incorporate the flavor.)  Splash in up to a half of a cup of water if needed.  Allow to simmer for a few minutes.  Enjoy! 


1 Tablespoon Cumin

1 Tablespoon Onion powder

1 Tablespoon Granulated Garlic

1 Tablespoon Smoked Paprika

1 Tablespoon Chili Powder

2 teaspoons oregano

2 teaspoons thyme

Small pinch of salt

1/2 tsp Pepper (adjust for your tastes)

1 pinch cayenne (optional)


Spiralized Nachos


Bored with traditional nachos?  On a grain free diet or just hoping to enjoy some nachos sans the guilt?  Today is your day!  These spiralized nachos are super fun, easy to make and healthy too!

Who doesn’t like curly fries?  I am guessing not that many of you.  When you spiralize a vegetable it changes it to something a little more fun and interesting.  Yes you can make this with sliced potatoes and/or squash but spiralizing them brings it up a level.  They turn into a haystack instead of just a plate.  Super yum!  You also end up using less as the spiralized veggies take up more space than a pile of sliced potatoes would.  In my opinion that leaves more room in my tummy for the toppings, and there is nothing wrong with that!

First step grab your spiralizer and secure it to the table according to your manufacturer’s directions.  Most just tell you to push down to secure the suction cups, others have a lock handle.  (If you are really patient and have a hand spiralizer just get spiralizing obviously…)

For this recipe I used butternut squash, sweet potatoes and russets but feel free to use whatever root veggies you would like.  Beets would be super gorgeous!

Cut the neck off of the squash seperating it from the more round bottom.  Peel the squash and cut it in half if necessary before securing it to the pusher part of your spiralizer.  Also scrub the potatoes and peel if desired.  Cut flat ends on the potatoes for easy spiralizing.  Using the second setting spiralize the squash, then spiralize your potatoes.  Lastly spiralize the onion.

Cut the vegetables with a scissors if desired to make them not so long. They will be much easier to eat this way.  For me I leave them super long as my kids really enjoy them this way.  (Messy but fun and hey they are eating vegetables I won’t complain.)

Now toss the spiralized pile with olive oil, salt and pepper and a tablespoon of my taco seasoning, recipe here.

Roast in a preheated 400 degree oven for 30 minutes stirring about halfway through for even browning.


Once your beautiful pile of spiralized deliciousness is done, remove them from the oven and pile them on an oven safe platter.  Top with shredded cheese and taco meat and return to oven to broil for about 5 minutes until cheese is bubbly and melted.

Remove from oven and top with salsa, guacamole, jalapeños, cilantro, raw onion, corn, black beans, sour cream…whatever you enjoy on your nachos go for it!  Snap a pic when you make this and share!  I would love to see what everyone else tops theirs with!

However you top them, enjoy!


Smokey Spice Rubbed Venison Chops with portabella mushrooms and onions

I would be lying if I said I wasn’t excited for this post!  In the area of the country we live in hunting is very prevalent.  If the season works out in our favor we end up with venison in our freezer to enjoy throughout the year.  What does one do with this meat?

People tend to find venison challenging to prepare, I am guessing this is because though it is similar to beef it has a finer texture, a lower fat content and a higher water content.  What do I do with this meat I asked myself many, many years ago.  When I inquired people gave me recipes that seemed to cover the meat flavor.  It was almost as if people were eating it begrudgingly, and force feeding it to their children.  Even the hunting magazines would recommend making beautiful backstraps into chicken fried steak with butter cracker crumbs.  If that is how you enjoy it, I am happy for you.  If you want to try something new, keep on reading, I promise it will get awesome…

Today we are preparing chops.  Venison chops are cut from the rib area of the deer, this tender meat runs along the spine. Sidenote… In the event you don’t enjoy or have any venison feel free too substitute lamb or grassfed beef either rib or shoulder chops for the venison.

Alright, lets do this!  My chops were beautifully butterflied and ready for me to work with, so I grabbed my trusty spice blend (see recipe below), it contains smoky, sweet, earthy and savory elements, think smoked paprika, cumin, thyme, coconut sugar (or brown if you prefer), thyme…and seasoned them on both sides.  Crushed a couple of garlic cloves, sliced a sweet yellow onion, and sliced up a portobella mushroom I had hanging around.

Next step heat that pan up.  I grabbed a sauté pan, in retrospect a cast iron pan probably would have brought it up even another level.  Heat your pan over medium high heat.  When your pan is hot, drizzle in about a tablespoon of extra virgin olive oil, add your chops and sear for 3-4 minutes.  Don’t touch the chops once you put them in the pan until the 3-4 minutes is up.  This is super important as if you begin to shift them around, they may stick and you will ruin the beautiful crust you are trying to achieve.

Once they are nice and browned on the first side, give them a quick flip to sear the other side.  Once you flip them add the onions, garlic and mushroom to pan around the chops and continue to cook for an additional 3-4 minutes again not moving the meat.  You will have to move the garlic, onion, mushroom mix around a bit to keep it from burning.  After you sear the second side, flip your chops once more time, that makes 2 flips, add the wine to the pan and allow to reduce by half as your chops finish cooking, approximately 2 minutes.  Remove the chops from the pan place on a warm serving platter, pour everything from pan on top scraping any browned bits off.  Don’t leave all that extra yumminess behind!

Allow to rest for about 5 minutes under foil.  Your chops should be medium following this time guideline.  If you prefer them more rare, or more well done make adjustments accordingly (+ or -1 minute at a time until desired temperature is reached).

No joke, my kids inhaled this as did my husband.  No nagging was involved, no bribery, no convincing.  Just straight up silence as they chewed.  Silence is golden as we all know especially when your house is a zoo, like mine.  Don’t get me wrong, I love my kids and know these are the glory days, and someday, sooner than I realize my house will be quiet again.  Yet sometimes just a nice peaceful dinner is nice.  In the spirit of a traditional midwest family dinner, my plate has mixed veggies and some lovely roasted squash.  I seasoned my squash the same as the venison with my smokey spice blend and roasted it until it was golden.  As for the fancy (okay they weren’t) veggies, just a quick steam and a grind of sea salt and black pepper, topped with a little butter.  Cheers!

I hope you enjoy your venison more after this post!  Feel free to reach out to me if you want more tips or tricks.  If you make this add a picture or comment to the post, I always love to hear from you!


Jamaican Jerk Chicken

Many of my friends have been subject to my Grilled Jamaican Jerk Chicken recipe.  Some have cried over a bowl of it they loved it so much, as the sweat poured off their faces… (you know who you are.) Others have begged for the recipe and added it to their regular meal rotation.

Challenged with teaching a class on batch cooking, I have taken it a step farther.  In the past I have marinated my chicken in this tangy, sweet and spicy sauce, then grilled them, but for my class I used the sauce as a way to bring back life to some leftover chicken thighs and roasted vegetables.

I prefer to double the marinade recipe so I have extra sauce and marinate bone-in chicken thighs or legs for at least an hour, overnight is better.  Then grill them using the indirect cooking method for 45 minutes.

Still awesome is this Jerk sauce with roasted vegetables over rice, prepared with coconut milk instead of water.

You can also use this sauce on fish, pork or turkey.  Your day after Thanksgiving turkey sandwich will be amazing if you mix a spoonful of this sauce with some mayo and spread it on your sandwich, or drizzle it over whatever leftovers you have.  Make a delicious Jerk Chicken pizza, pasta, quesadillas …the options are endless.

To prepare for use as a sauce over cooked chicken and vegetables heat pan over medium heat.  Swirl in olive oil and begin to cook the diced onions.  Sauté onions for about 5 minutes until they begin to become translucent.  Add garlic and other spices and continue to sauté for an additional 2 minutes.  Add balance of ingredients and allow to simmer for about 10 minutes to allow all the flavors to marry.  Toss with your chicken and vegetables and serve over rice.

To use as a marinade, add all ingredients to a large zip top bag.  Mix well.  Add chicken and allow to marinate for at least an hour, preferably overnight.  Remove meat from marinade and fully cook on the grill or in the oven.  While chicken cooks, bring marinade to a boil, then allow to simmer for about 10 minutes.  Top chicken with extra sauce and/or serve on the side.

Either way you choose to go with it, enjoy!


This recipe was originally adapted from a post from literally over 10 years ago I found here

http://classic-recipes.com/page/poultry/jerkchk.htm

Use organic non-gmo ingredients whenever possible.

Pressure Cooker Butternut Squash Risotto

Recipe remix time!  Move over Pumpkin Spice Latte!  I know we all love risotto and I also understand the time commitment involved in making a great pan of it.  Three kids and a crazy schedule does not equal risotto.  So today I decided to remake my Pumpkin Risotto with Browned Butter Sage Leaves but this time using my trusty Instapot.

I changed up a couple of ingredients since the amount of liquid used is significantly less, and the cook time is slashed as well.  Butternut Squash has less water than pumpkin and is more readily available right now making it an awesome choice for this delicious fall inspired risotto.

By taking the extra step to roast the Butternut Squash you are coaxing all the sweet natural sugars out of the squash really making it shine!  You could just brown it in the instapot, but you won’t achieve the same result.  It will still be awesome, but it could be even more awesome if you can roast it.

To start peel and dice the squash.  Toss it with extra virgin olive oil and salt and pepper.  Roast in a 450 degree oven for about 30-45 minutes or until it is soft and golden.  While this is roasting get to work on your risotto and browned butter sage leaves.

If you have never had browned butter Sage leaves you are in for a treat!  Grab your butter stick and melt in a pan over medium heat.  Keep an eye on it after it melts and let it continue cooking until the fat separates and you see a nice brown color.  Don’t go to far or you will have burnt butter.  Just a nice deep golden brown.  Now drop in your Sage leaves and allow to cook for 2-3 minutes.  They are done when you begin to see spots on them.  Allow to cool on paper towels and set aside.  These will finish off your dish with a little sophistication at the very end.

Brown butter fried sage leaves

Saute your diced vegetables, garlic and herbs on sauté setting in about a tablespoon of oil.  Remove veggies and add the the measuring cup.

Next sauté the sausage in a little more oil until cooked through.  Add rice and continue to cook for about 2-3 minutes. The rice will turn clear then almost white again.  Add wine and allow to simmer down until most of the liquid is gone, this should take only a couple of minutes.

Now add the chicken stock to the measuring cup with the vegetables (except the squash) and make sure you have exactly 4 cups in there.  No more no less.  This is super important.  Add to the pot and seal lid.  Make sure the lid is set to pressure.

Press manual and adjust to 7 minutes.  When your machine is finished (about 20 minutes between coming to pressure and the actual cook time) shut it off right away and do a Quick Release.  Once all the steam is released carefully open the lid and remove the pot.  Stir in approximately 4 cups of the roasted squash, and your shredded cheese (cheese is optional but delicious).

To serve top each dish with a few fried Sage leaves and enjoy with a crisp salad and a great glass of wine.

Enjoy!  Blessings

Albondigas–Spanish Meatballs (kefta style)

We love visiting my family in Marbella, Spain.  Not only do we get to spend a lot of time catching up with my favorite Uncle and family, we also enjoy plenty of sun, sand and amazing food.  Generally I am all about the fresh fish and eat as much of it as I can while I am so close to the Mediterranean.  I also love the Kefta served at Gurrola, a little cantina in Marbella where my Uncle and his buddies can be found most days around noon.  The Kefta at Gurrola is a version of the delicious albondigas or Spanish meatball, cooked in a delicious tomato sauce containing several Moroccan style spices, think cumin, cinnamon, etc.  Clearly not fresh fish related at all, but so amazing!

Now I am not going to claim these are exactly the same as the deliciously spicy albondigas at Gurrola, nor can I somehow cook up the atmosphere you would enjoy there, but these are as close as my tastebud memories can take me.  And when I take a bite of one of these delicious spicy meatballs and close my eyes I can almost smell the Mediterranean Sea and hear my Uncle chatting it up with his buddies.

These come together rather fast and can absolutely be made up a day or two ahead of time and stored in the refrigerator, or frozen for a couple of months, properly stored.

To make these meatballs I have used grassfed ground beef and/or venison or lamb.  The slightly earthier flavor of the grassfed beef (or venison or lamb) add to the authentic flavor of the meatballs, not to mention grassfed beef has so many great health benefits compared to commercial beef.

Step one prepare your sauce so it has time to simmer while you assemble your meatballs. Begin by heating a pan over medium high heat.  When your pan is hot drizzle in a tablespoon or two of extra virgin olive oil (Spanish if you have it).  Sauté onion in oil for 5-7 minutes until softened and fragrant.  Add garlic and continue to cook for another minute.  Now season your onion and garlic with the paprika, cumin, salt, and pepper.  Stirring rather constantly cook for an additional couple of minutes giving the spices time to develop.  Lastly add tomatoes to pan along with cayenne, cilantro, parsley and bay leaf.  Allow to simmer while you prepare your meatballs.  If you made your meatballs in advance, allow sauce to simmer for about 15-20 minutes before adding them to the sauce to cook.

For the meatballs, mix all meatball ingredients together with the exception of the water, using your hands.  Take care not to overwork the meatballs as this can make them tough.  Once the ingredients are well incorporated, roll them into balls about the size of half a golf ball.  Place all the meatballs along with the water into the pan and cover.  Lower heat to a simmer and allow to simmer for about 45 minutes.

Top with additional fresh cilantro and parsley.  Serve warm with lots of crusty bread for sopping up all of that delicious sauce.


Cheers!


Best Chili Ever–Instapot or slow cooker!

Everyone has their favorite chili recipe so best chili ever may be a bit bold…but that is what my husband said when he tried this chili so I am going with it!  I made mine in an Instapot but you can definitely make this on the stove or in a slow cooker.

I like making a huge batch when I make chili as it makes a great lunch the next day, or a super yummy dinner with little effort the following night.  Ideas for this super yummy dinner could include chili cheese fries, chili stuffed baked potatoes, chili quesadilla or burrito, chili cheese mac, chili pizza the list goes on and on…tell us your favorite!

I started my chili with dried beans instead of canned, feel free to sub 2 cans of beans if you wish.  To cook the beans I put one cup of dry beans in the Instapot with 3 cups of water.  Using the manual setting with the valve set to pressure I pressure cooked them for 25 minutes, then manually released the pressure.  Set beans and cooking liquid aside.  If you need directions on how to cook the beans without an Instapot, directions can be found here.  Turn off cooker and turn it back on to sauté.  Once the pot is hot, drizzle in a couple tablespoons of olive oil then brown your ground beef and sauté the onions in the pot together.  Since I use grassfed beef I generally don’t need to drain the fat off, if you need to, please do so once the meat has browned.  Now toss in the garlic and sweet potatoes along with herbs and spices.  Let these guys cook together for a minute or two, then simply dump the rest of the ingredients into the pot, including the beans and bean water.  Reseal Instapot and using manual setting cook  for 15 minutes.  Let natural release and hold until ready to serve or go ahead and release the pressure manually after a couple of minutes if you have a hungry crew who can’t wait.  Be sure to check for seasoning before serving, as the tomatoes, and possibly your beans contain salt, seasoning at the end will give you more control of your finished dish.

Alternately, for slow cooker preparation, do all the browning/sautéing on your stovetop, then mix everything into the your slow cooker and set on low heat for up to 8 hours.

Top with shredded cheese, raw onion, avocado, tortilla chips, cilantro…whatever you please, and enjoy!  Cheers!


Instapot Italian Beef Ragu with Butternut Squash Noodles (squoodles)

Italian Beef Ragu with Butternut Squash Noodles

Happy New Year!!  I am always sad to take down our Christmas tree and decor.  At the same time I prefer my stand up paddle board to my cross country skis so being one step closer to Spring isn’t so bad either!  This year I am hoping to share more recipes and insight with you, including Instapot recipes!  This recipe can definitely be made stove top as is traditional, in a slow cooker or in your Instapot or other pressure cooker.

Traditionally this delicious slow simmered Ragu would be prepared stove top, simmered over several hours.  For Christmas Day I prepared this recipe with a slight variation stovetop (recipe here) and we enjoyed every delicious bite on some chewy delicious parpadelle pasta.  Yes actual gluten loaded pasta…and it was divine.

[amazon text=Amazon&asin=Today in keeping with my more paleo-ish lifestyle I have prepared it with spiralized Butternut Squash.  The earthy sweetness of the squash paired super well with the deep beefy tomato yummyness.  I also grabbed my Instapot for this one as I was rather short on time and it didn’t disappoint!  I chose to leave out the tomato paste that I had used on Christmas in my more traditionally prepared Ragu as sometimes the tomato paste can burn to the bottom of your Instapot.

For the preparation, turn your Instapot on sauté.  Cut your roast into 4 equal size chunks, season with salt and pepper.  Once your Instapot is hot sear 1 or 2 pieces at a time browning on all sides (2-3 minutes a side).  Then set aside.  Next sauté the “sofrito”, carrot, celery and onion in a bit of olive oil and a pinch of salt and a pinch of black pepper for about 5 minutes to really develop the flavor.  Add garlic, oregano and thyme and continue to sauté for an additional minute or until fragrant.

Deglaze the pan by pouring in 3/4 cup of a good dry red wine, I had a Spanish Tempranillo open so I chose that for my sauce.  Let it simmer for a minute or two or until the liquid reduces just a little.

Pan full of Butternut Squash Noodles

Now add the beef, beef stock, and tomatoes to the veggies and wine. I usually wait until the end to salt as there is salt in the tomatoes and the stock and as it reduces it will concentrate the salt flavor.  Lock cover on Instapot and press manual then adjust to 20 minutes on high pressure.  While your Ragu is cooking grab your spiralized and spiralize your Butternut Squash.  Any pieces that couldn’t be spiralized save for squash fries or squash hash or whatever your desired preparation.  Toss your squash with a tablespoon of olive oil and a touch of salt and pepper and roast in a 400 degree oven for 20 minutes.  You should have plenty of time for this step as it takes a while for your pressure cooker to come to full pressure (up to 15 minutes).

After the 20 minute pressure cook is complete allow to natural release for a minute or so then flip the valve to manual release.  I use my Instapot on my stovetop with a cutting board under it, so I can use my fan to vent steam, etc.  I really don’t want to damage my cupboards while releasing steam or smoke the house up searing meat!  Okay once your steam is all released and you can safely open your pressure cooker turn it off, then back on the sauté high.  Remove meat and shred while the sauce is reduced until it thickens.  Then toss Squash Noodles  (squoodles) into the sauce and let it cook for a minute or two longer.  Season to taste with salt and pepper, pile it on your favorite pasta plate, hit it with a grating of Parmesan or Pecorino and enjoy.

Cheers!

Italian Beef Ragu with Butternut Squash Noodles

PS:  Don’t let the wine you opened go to waste.  If you don’t enjoy drinking it be sure to freeze it in ice cube trays for future recipes.

PPS:  There was an error in the original recipe, I have since reduced the beef broth on the recipe from two cups to one.  Sorry for any inconvenience this caused!

Instapot my new favorite kitchen essential


I have been searching for a crockpot that I could brown meat and sauté veggies in for a while.  As I am also very cautious of the materials products that touch my food are made of, something aluminum was definitely not going to work.

As I was reaching the end of my 3rd pregnancy I was doing everything I could to be ready.  Since we don’t eat processed food make ahead meals were important on my list but with or chaotic schedules and my lack of energy it is wasn’t happening.

Then it happened!  Amazon sends me an email with the Instapot flash sale!!  Are you kidding me!  I thought I was in the know when it came to kitchen gadgets but somehow I had never been introduced to the Instapot…

It took me about 10 minutes (okay maybe less) to decide I NEEDED this “tool”. I say tool jokingly as my 6 year-old walks in and says, what’s that mom?  I say it’s my new tool, her response was “umm Mom that looks like a toy not a tool”.  Some people’s  kids…

Uses for this beauty, well it is a rice cooker/pressure cooker/crock pot all in one.  It seriously replaced my pressure cooker and my crockpot and saves me washing extra pans too!  I have made risotto in minutes without stirring, one pot pasta, seared and cooked some beautiful beef roasts that would melt in your mouth, made homemade soup, made chicken stock, I even cooked an entire chicken in 25 minutes.  As I am still learning what this beauty is capable of I have discovered Facebook Instapot groups, Pinterest pages dedicated to the Instapot and countless blogs that specialize in Pressure cooker recipes.  I am hoping to post some of my own recipes soon too!

If anyone has a favorite Instapot recipe , please share it in the comments,I would love to hear it!


Cheers, and have a very Merry Christmas season!

Oven Roasted Sweet potato fries

img_3009

One of my kids favorite sides and mine too, sweet potato fries!  My son went through a phase of refusing to eat any vegetables, when I say phase I actually mean a year and a half of his 3 1/2 year life. He would literally gag if a veggie so much as dared pass through his lips.  I soon discovered that fries though were completely acceptable.  So I started making everything into fries.  Sweet potatoes, squash, beets, egggplant…if it was sliceable it became a fry.  I love these sweet potato fries with just ketchup but they are awesome with other toppings for example taco meat, cheese and guacamole.  Use your imagination, and please share!

The preparation well, easy peasy as my daughter says, just check me out making them while wearing a baby…

img_3003

Just scrub your sweet potatoes, then slice into planks and then into strips.  I try to slice them very thin, between an eighth and a sixteenth inch.  Toss them with a bit of olive oil salt and pepper.  Spread them onto a parchment lined sheet pan and pop into a 450 degree oven.  Roast until dark golden, about 45 minutes to an hour.

img_2436

Put them alongside a nice juicy burger or just chow them down with some ketchup.  However you enjoy them, cheers!!


P.S. checkout my video for step by step directions and a cameo by all 3 of my little lovies…


  • « Previous Page
  • 1
  • 2
  • 3
  • Next Page »

Meet the Author

MaryJo is a busy mom with 3 beautiful children. She enjoys paddle boarding, kayaking. and cross country skiing. She loves food...cooking it, eating it and especially sharing it with everyone.

Connect With Me

  • Facebook

Copyright © 2025 · Foodie Pro Theme by Shay Bocks · Built on the Genesis Framework · Powered by WordPress